How to Apply Numeric Types
Numeric type data can be effectively used in various parts of your Figma designs, such as for specifying width, height, gap, padding (both horizontal and vertical), border thickness, and corner radius.
Prepare Your Data
Naming Your Table Header
Name your numeric data column with a title, such as “Number”.
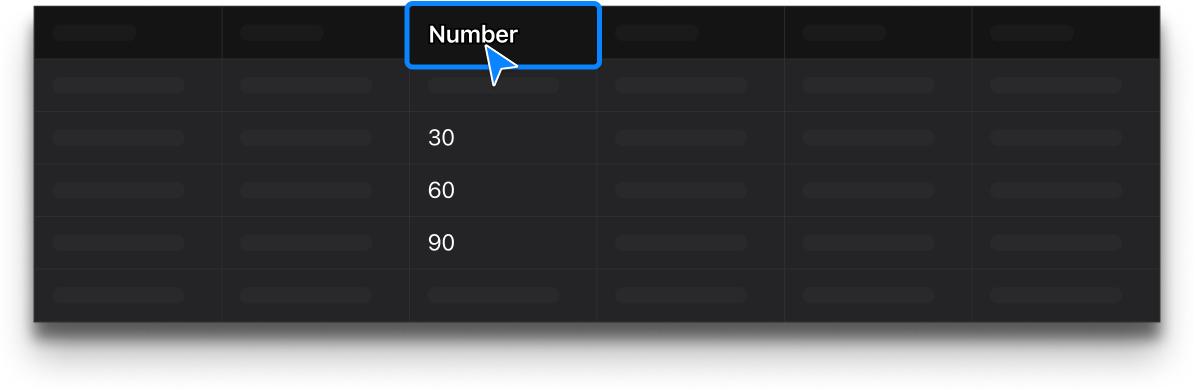
Prepare Your Data
Import Data into the Plugin and Create Your Design
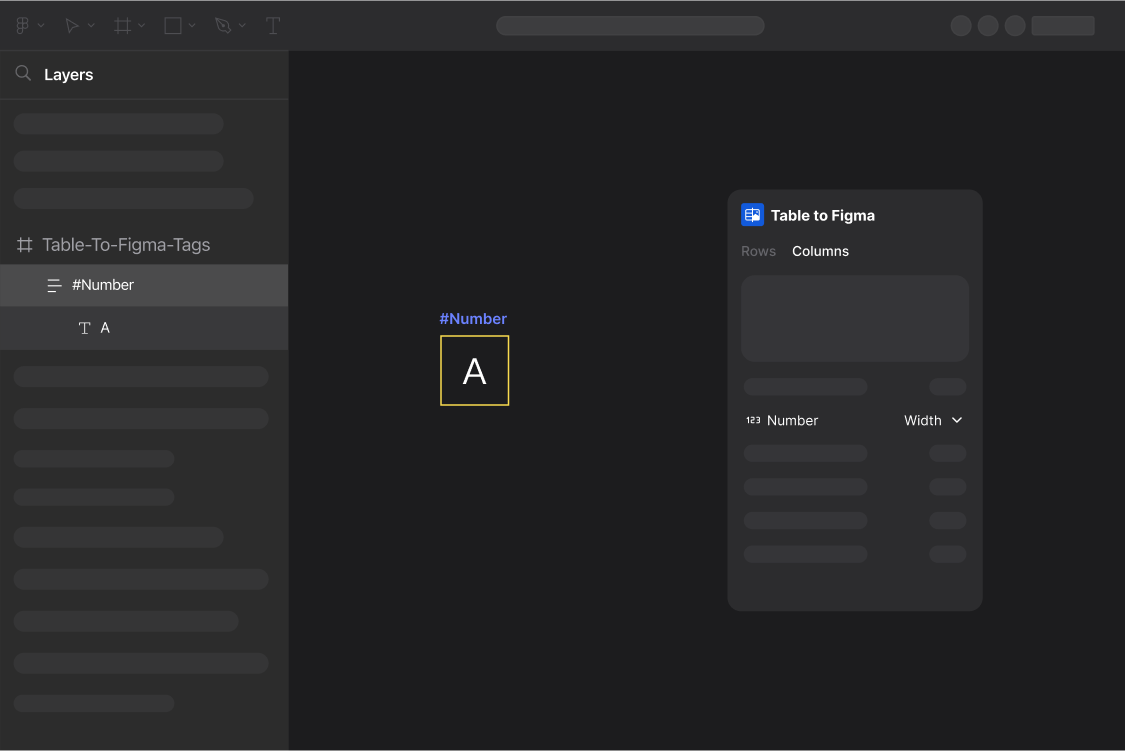
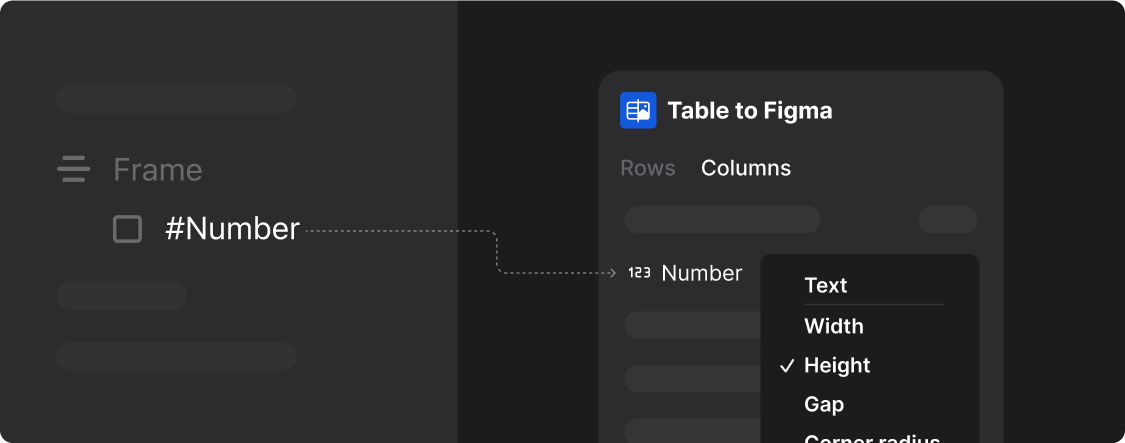
Open Table to Figma, import your data, then switch to the column properties. In Figma, prepare your layers for application. Your preparation should look as shown below:
Step One
Binding Layers
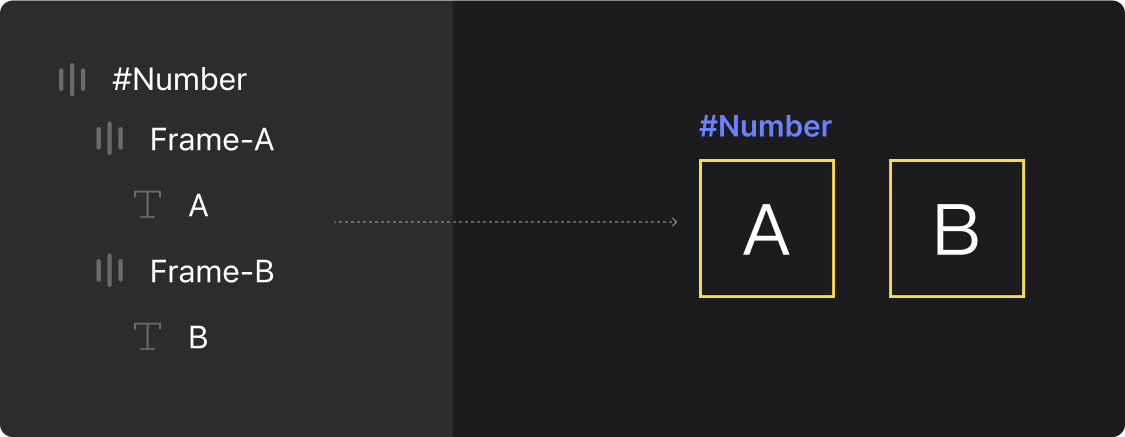
In your Figma file layers: Simply name your layers using the format #ColumnName to bind the corresponding layer’s properties, as shown below:

To change the Gap property, you need at least two elements, and bind the numeric property to the parent, like #ColumnName(Parent) -> Frame A (Child), Frame B (Child).
Step Two
Select Column Properties
There are many column properties for numeric items in the plugin. You can modify the width and height of an element by changing the column property to Width or Height. Modify the element’s border thickness and corner radius through Stroke Weight and Corner Radius. Add a gap between two different elements through Gap, and increase padding inside the element through Horizontal or Vertical Padding.
Step Three
Generate Results
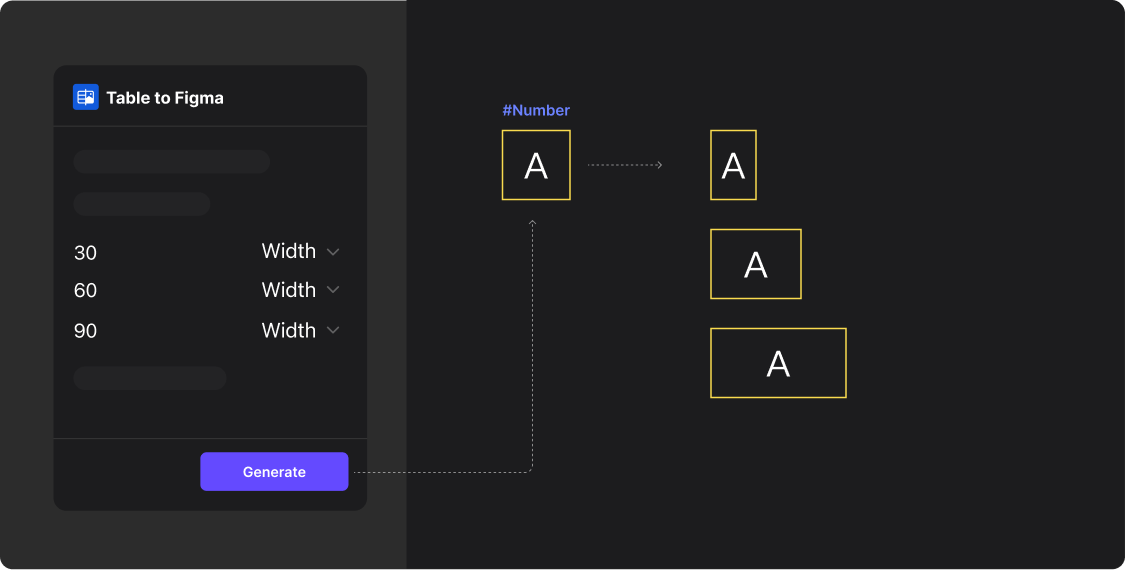
With layers selected and column properties set to “Width”, click the “Generate” button in the Table To Figma plugin to modify the width of the element, as shown below:
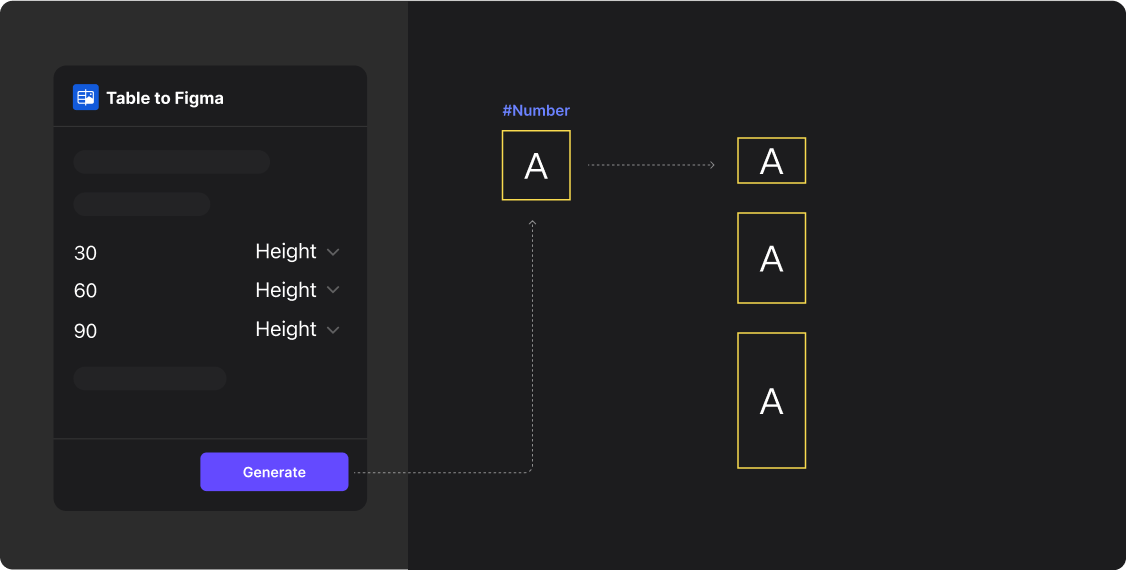
With layers selected and column properties set to “Height”, click the “Generate” button in the Table To Figma plugin to modify the height of the element, as shown below:
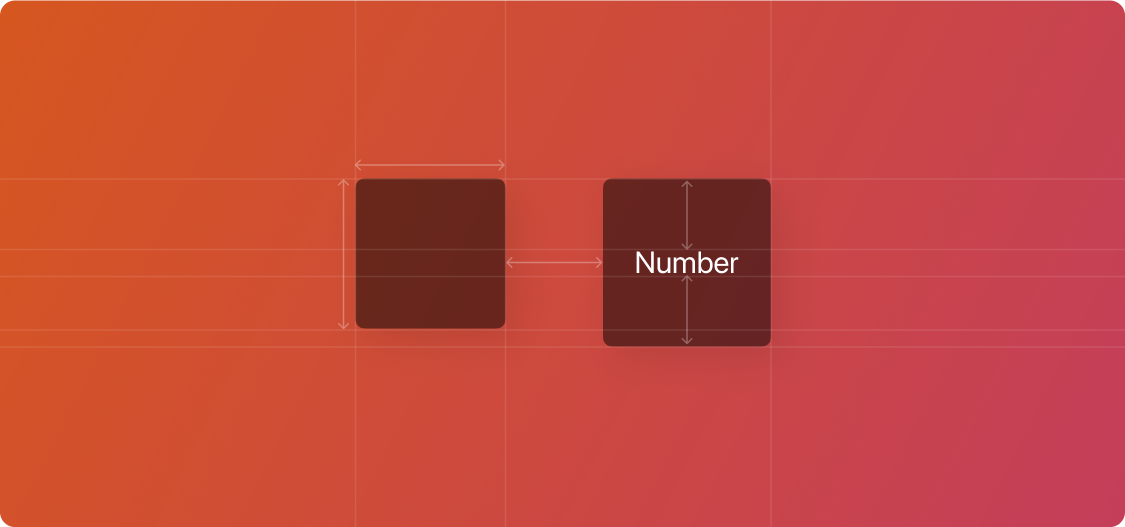
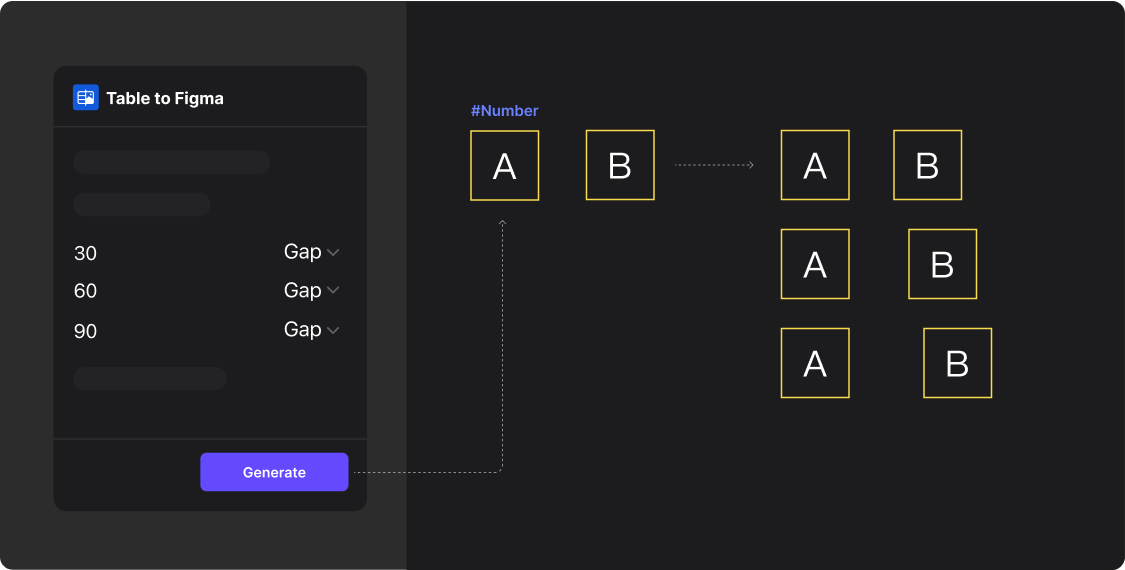
With layers selected and column properties set to “Gap”, click the “Generate” button in the Table To Figma plugin to modify the gap between elements, as shown below:
With layers selected and column properties set to “Horizontal Padding”, click the “Generate” button in the Table To Figma plugin to modify the horizontal padding of the element, as shown below:

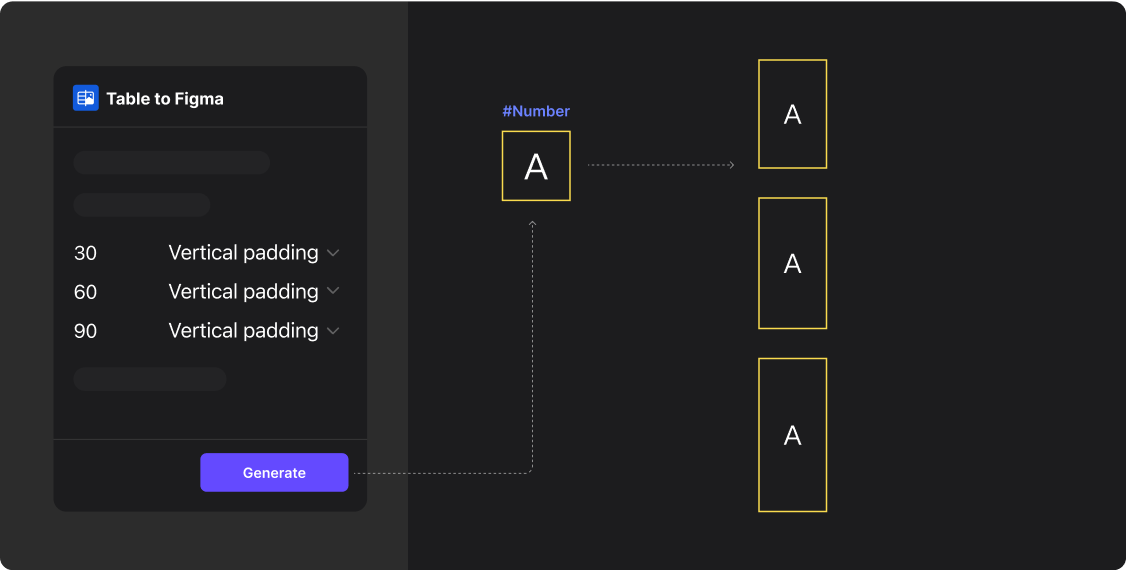
With layers selected and column properties set to “Vertical Padding”, click the “Generate” button in the Table To Figma plugin to modify the vertical padding of the element, as shown below:
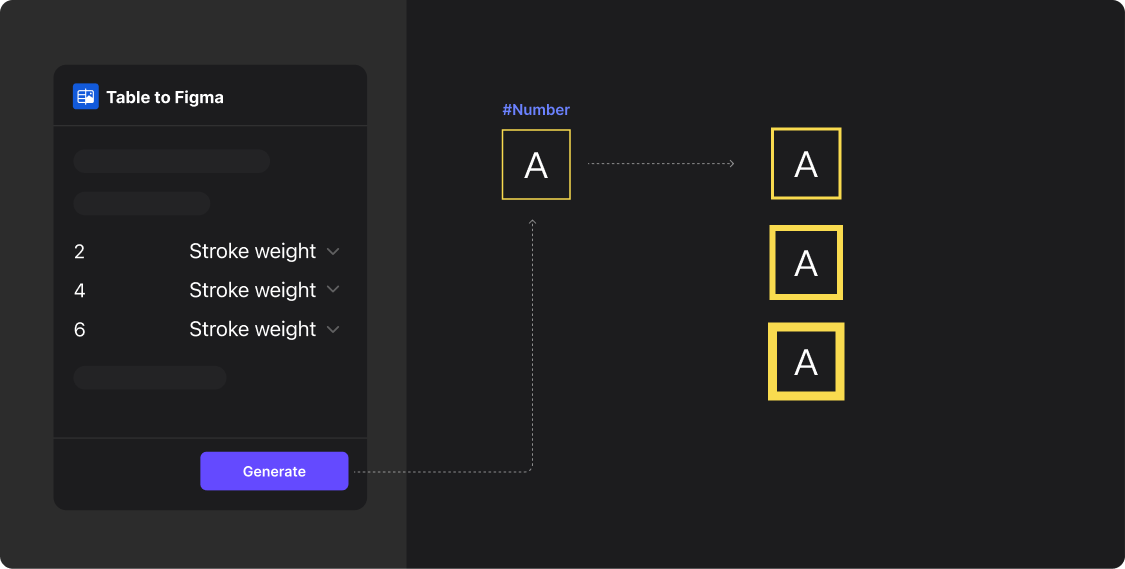
With layers selected and column properties set to “Stroke Weight”, click the “Generate” button in the Table To Figma plugin to modify the border thickness of the element, as shown below:
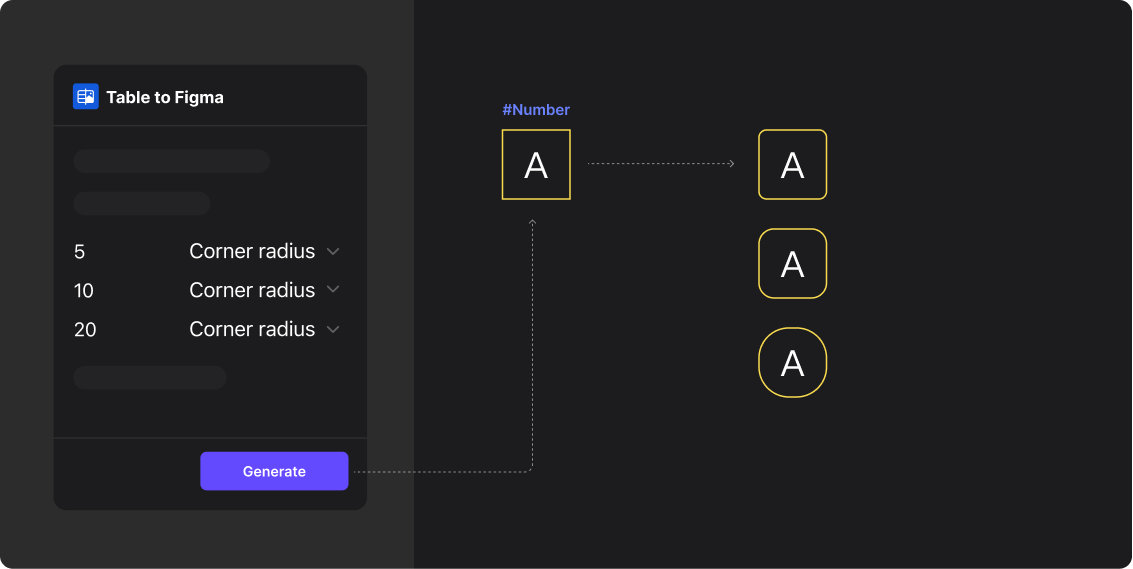
With layers selected and column properties set to “Corner Radius”, click the “Generate” button in the Table To Figma plugin to modify the corner radius of the element, as shown below: